
Agile Retrospectives for Confluence works as a macro that you can add directly to any Confluence page.
Creating a retrospective session
Follow these steps to create a retrospective session:
-
Go to the Confluence page where you want to host the retrospective and click the pencil icon to edit it
-
Insert the app’s macro on the page by clicking “+” sign, typing “Agile Retrospectives” in the search bar and selecting the app.
-
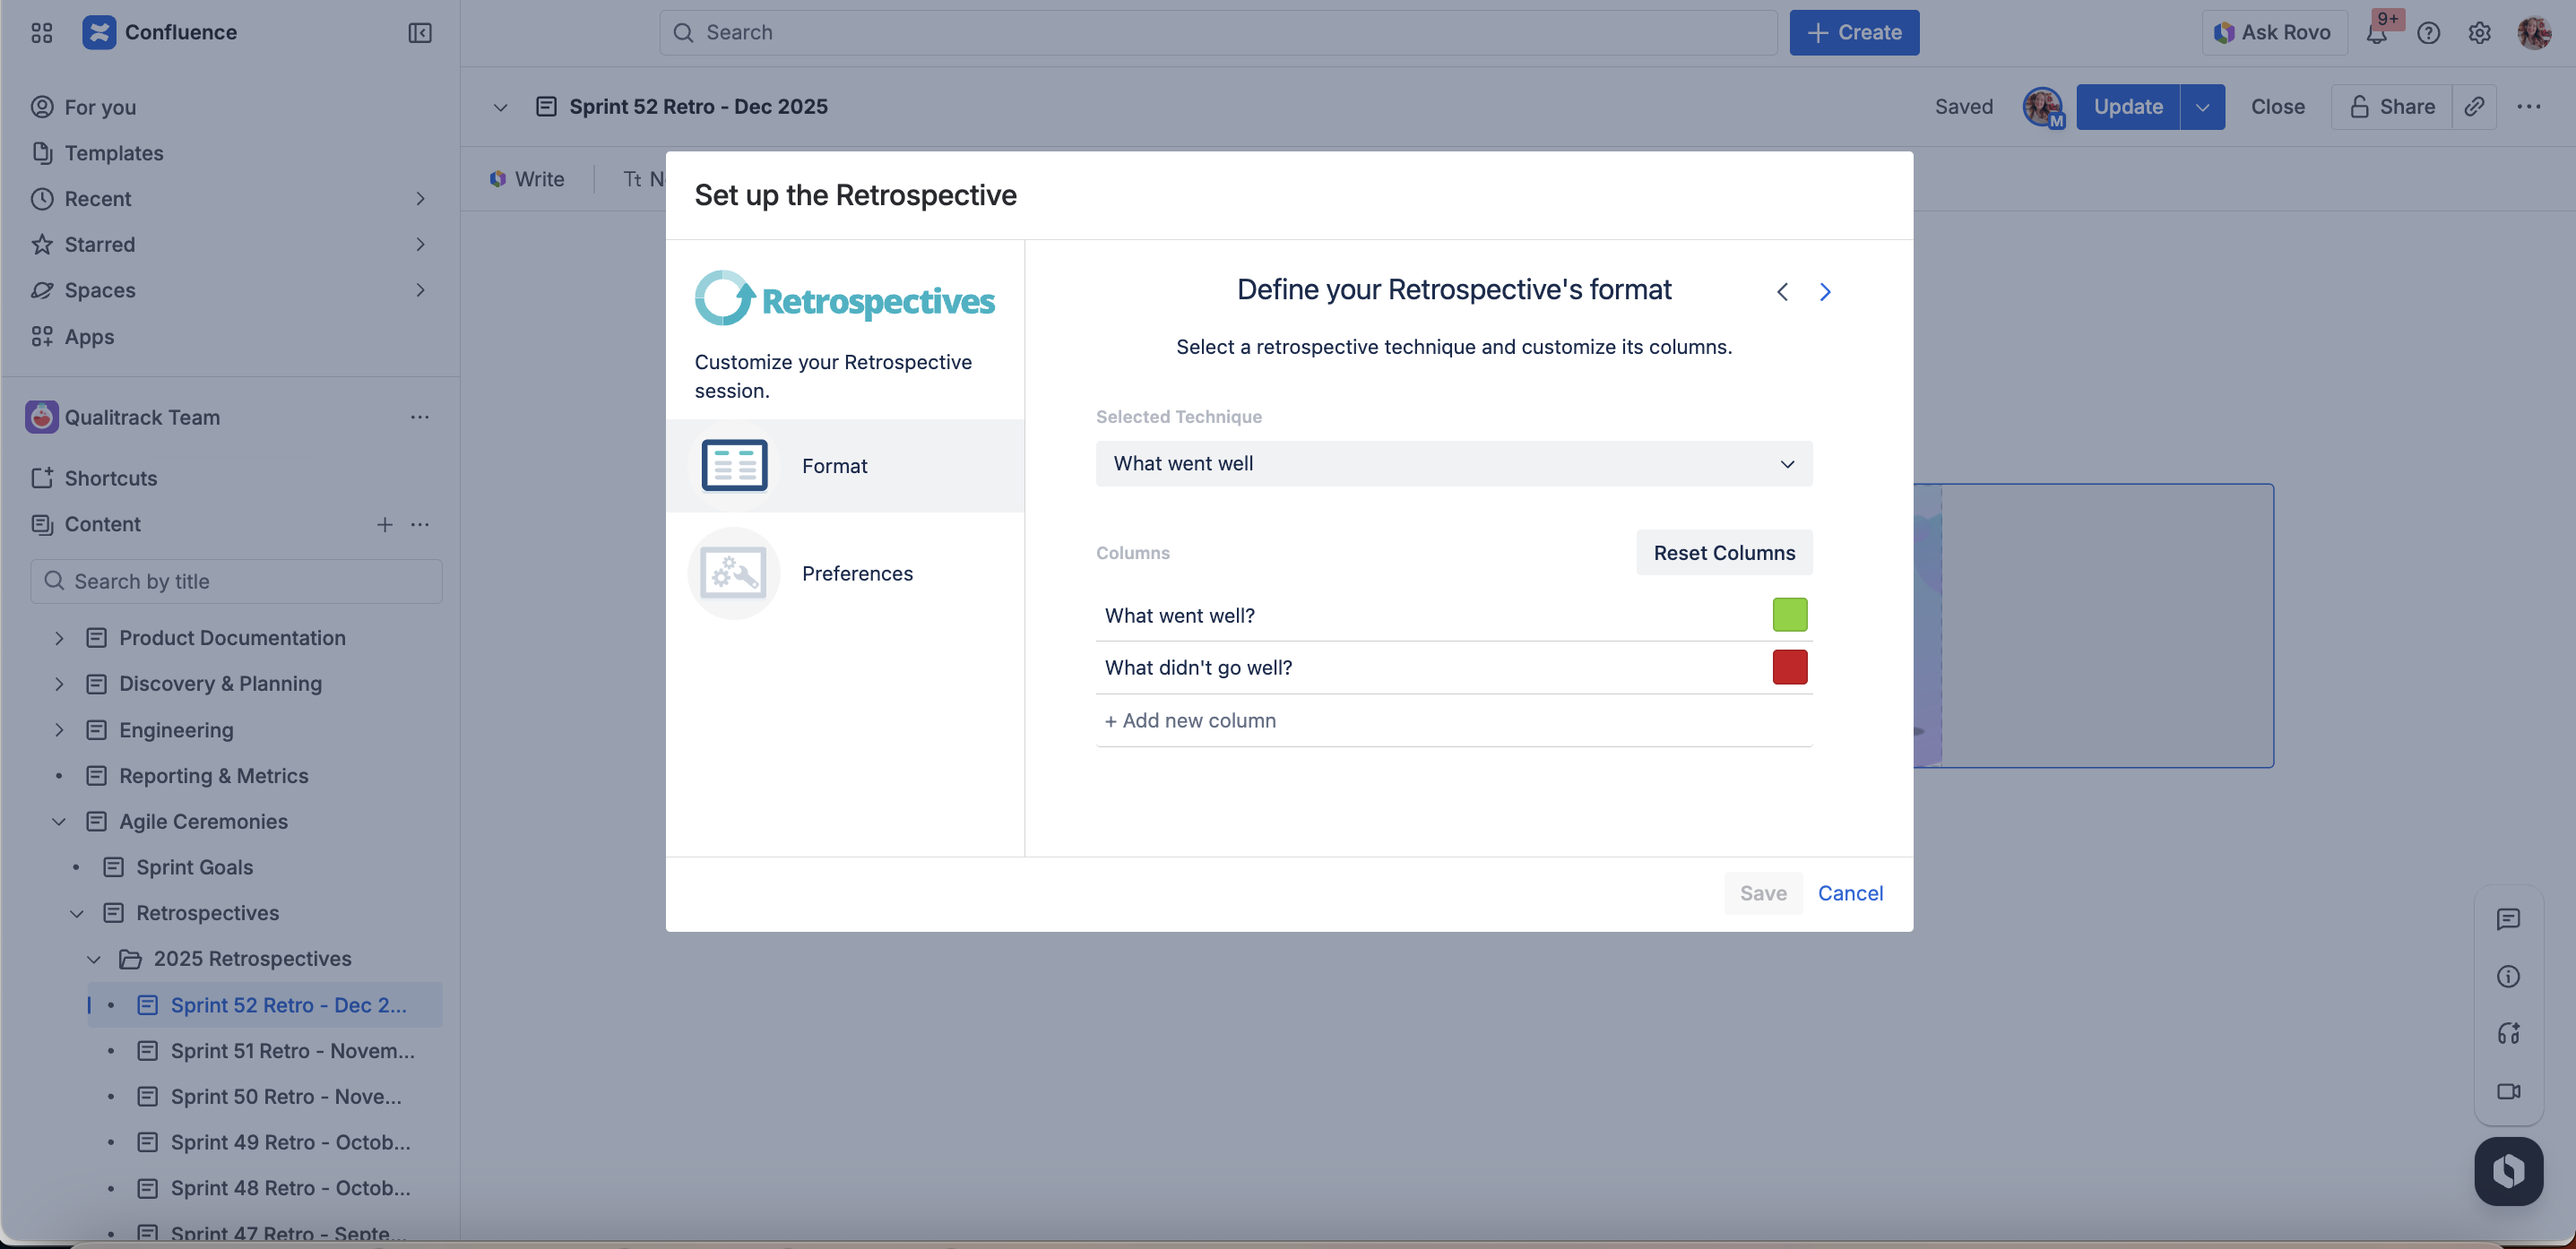
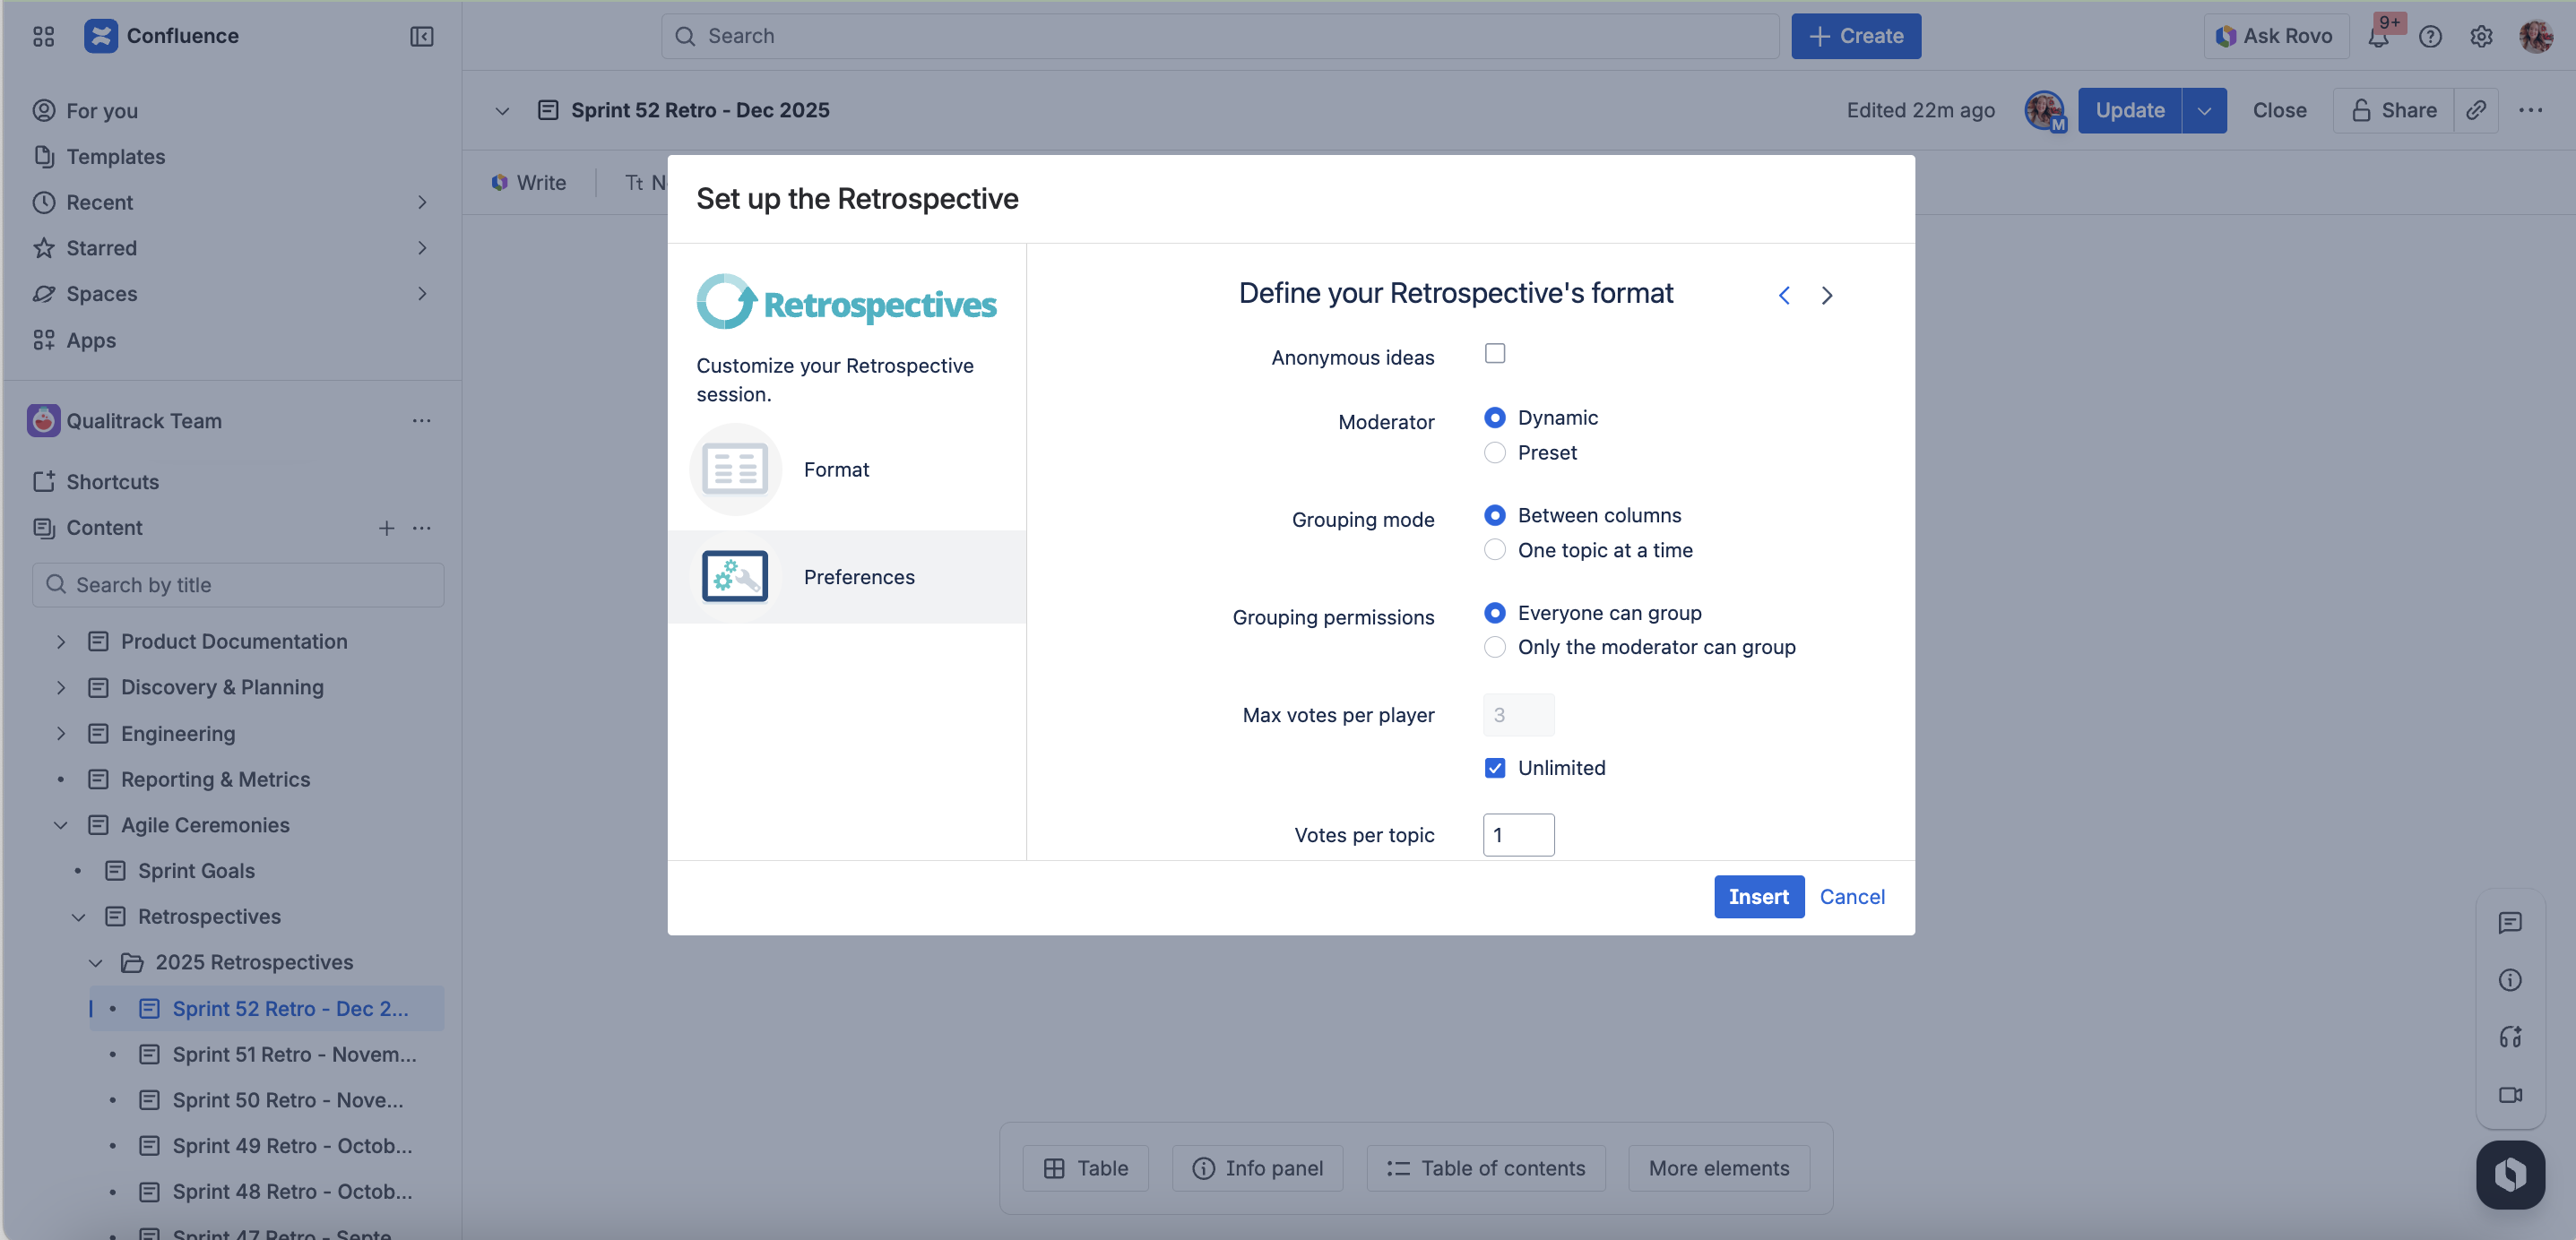
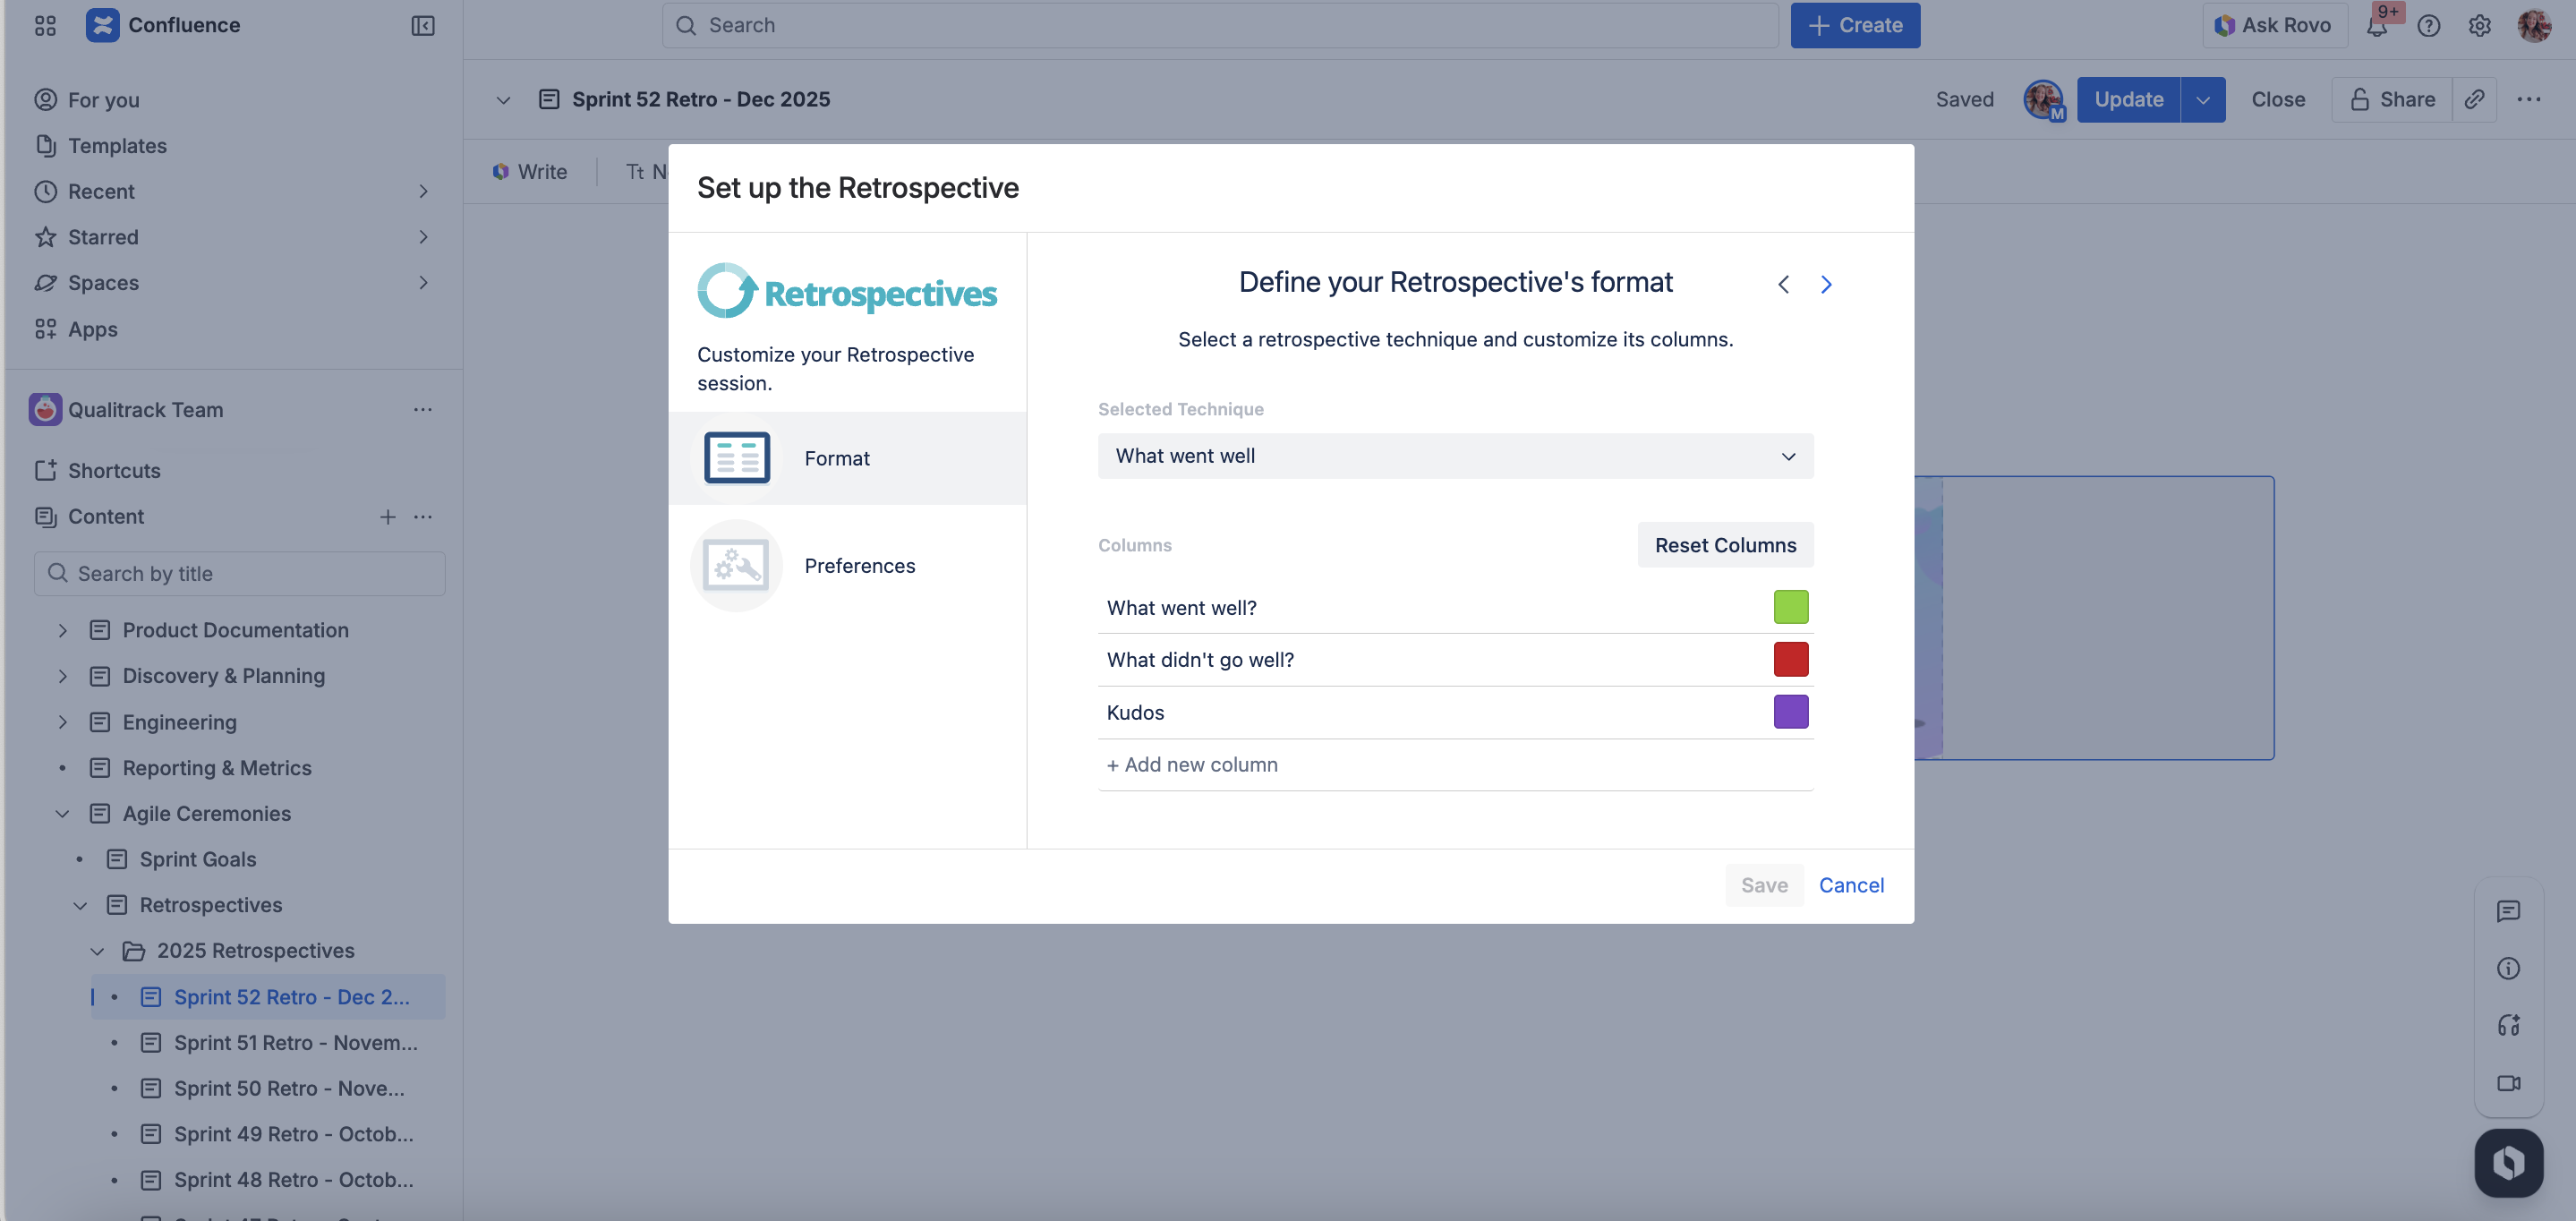
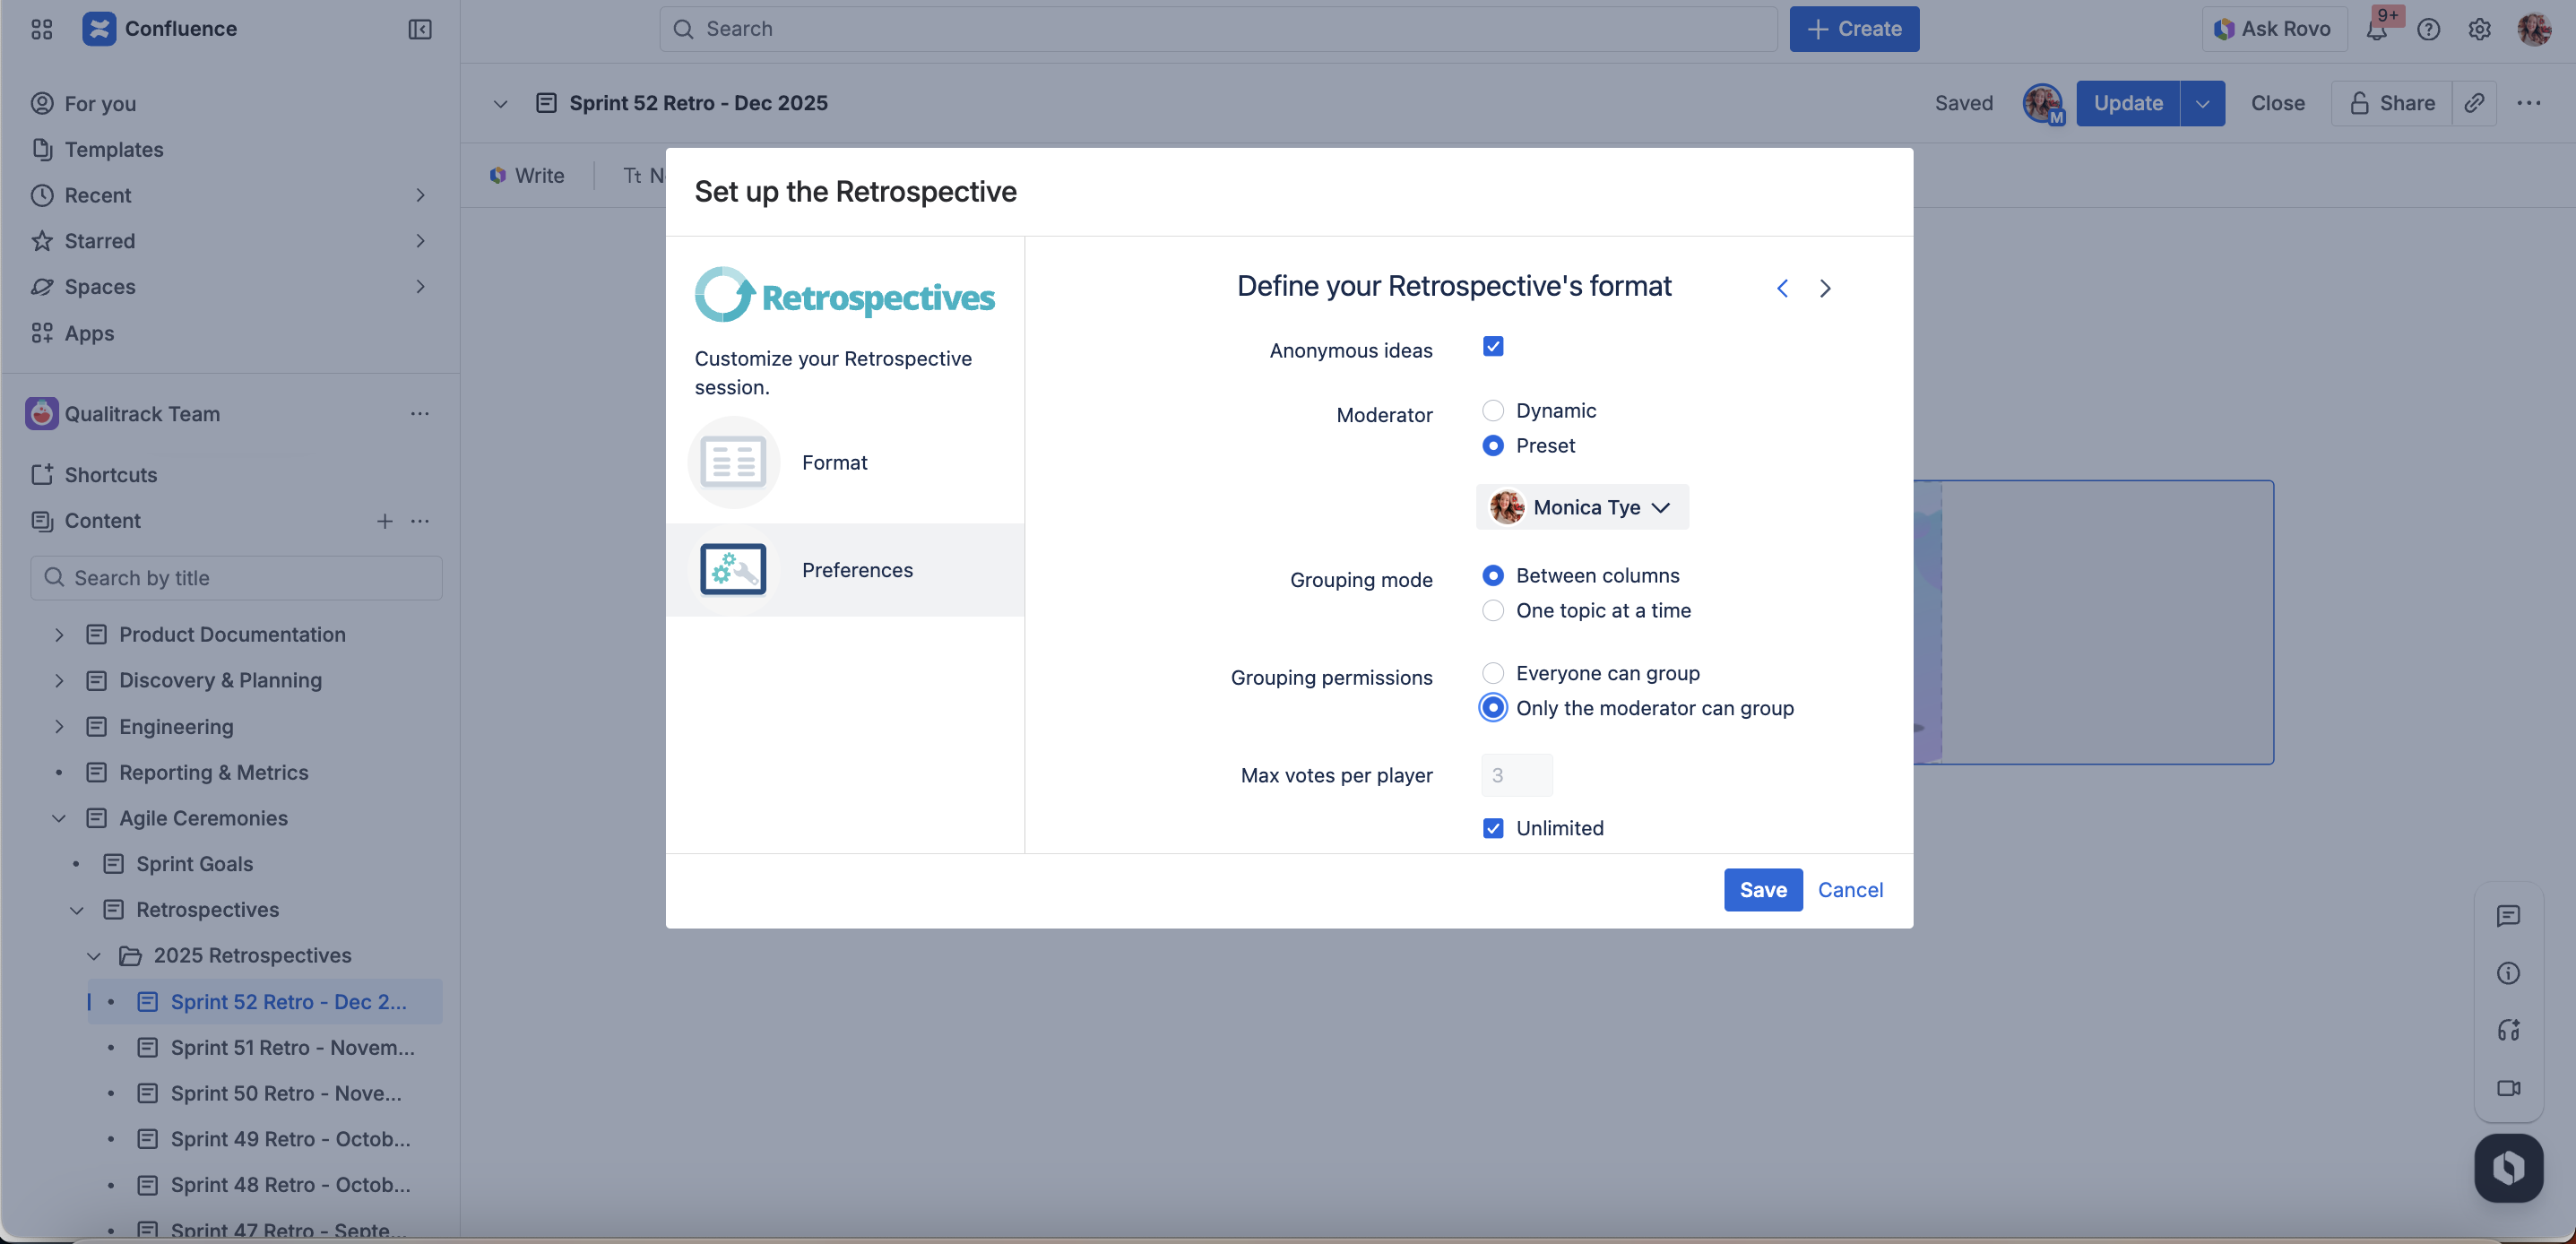
A dialog will open displaying the Retrospective Setup.
For more information about how to customize your session’s settings, visit this guide.
-
Once you have edited your session’s configuration, click on Insert.
-
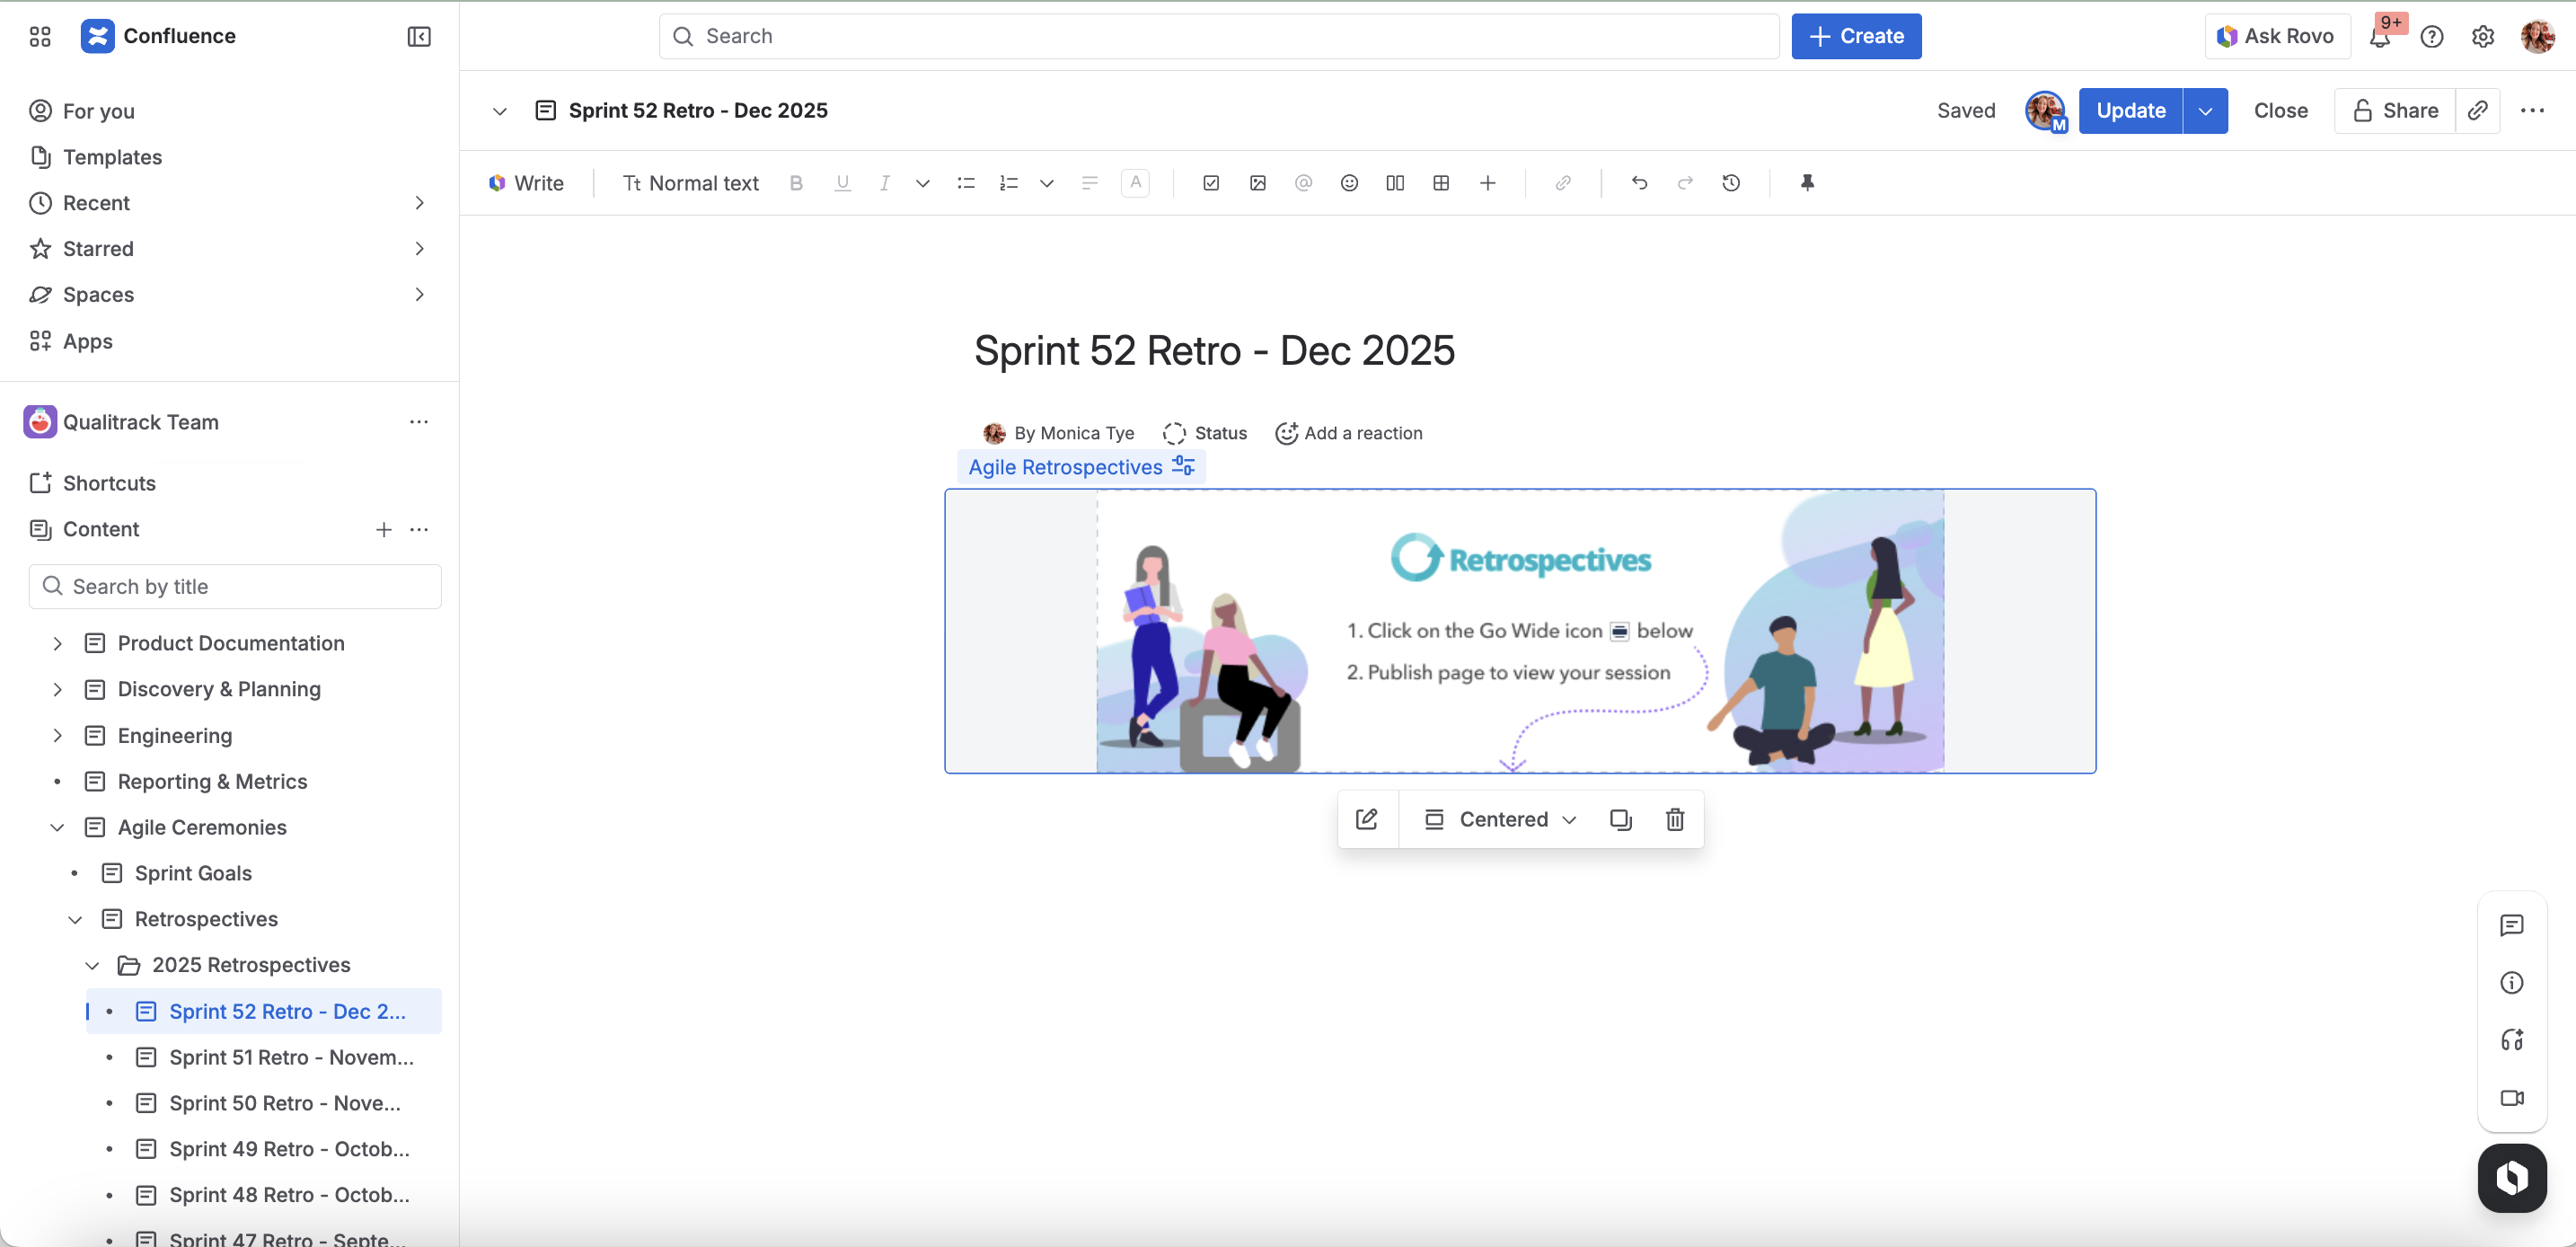
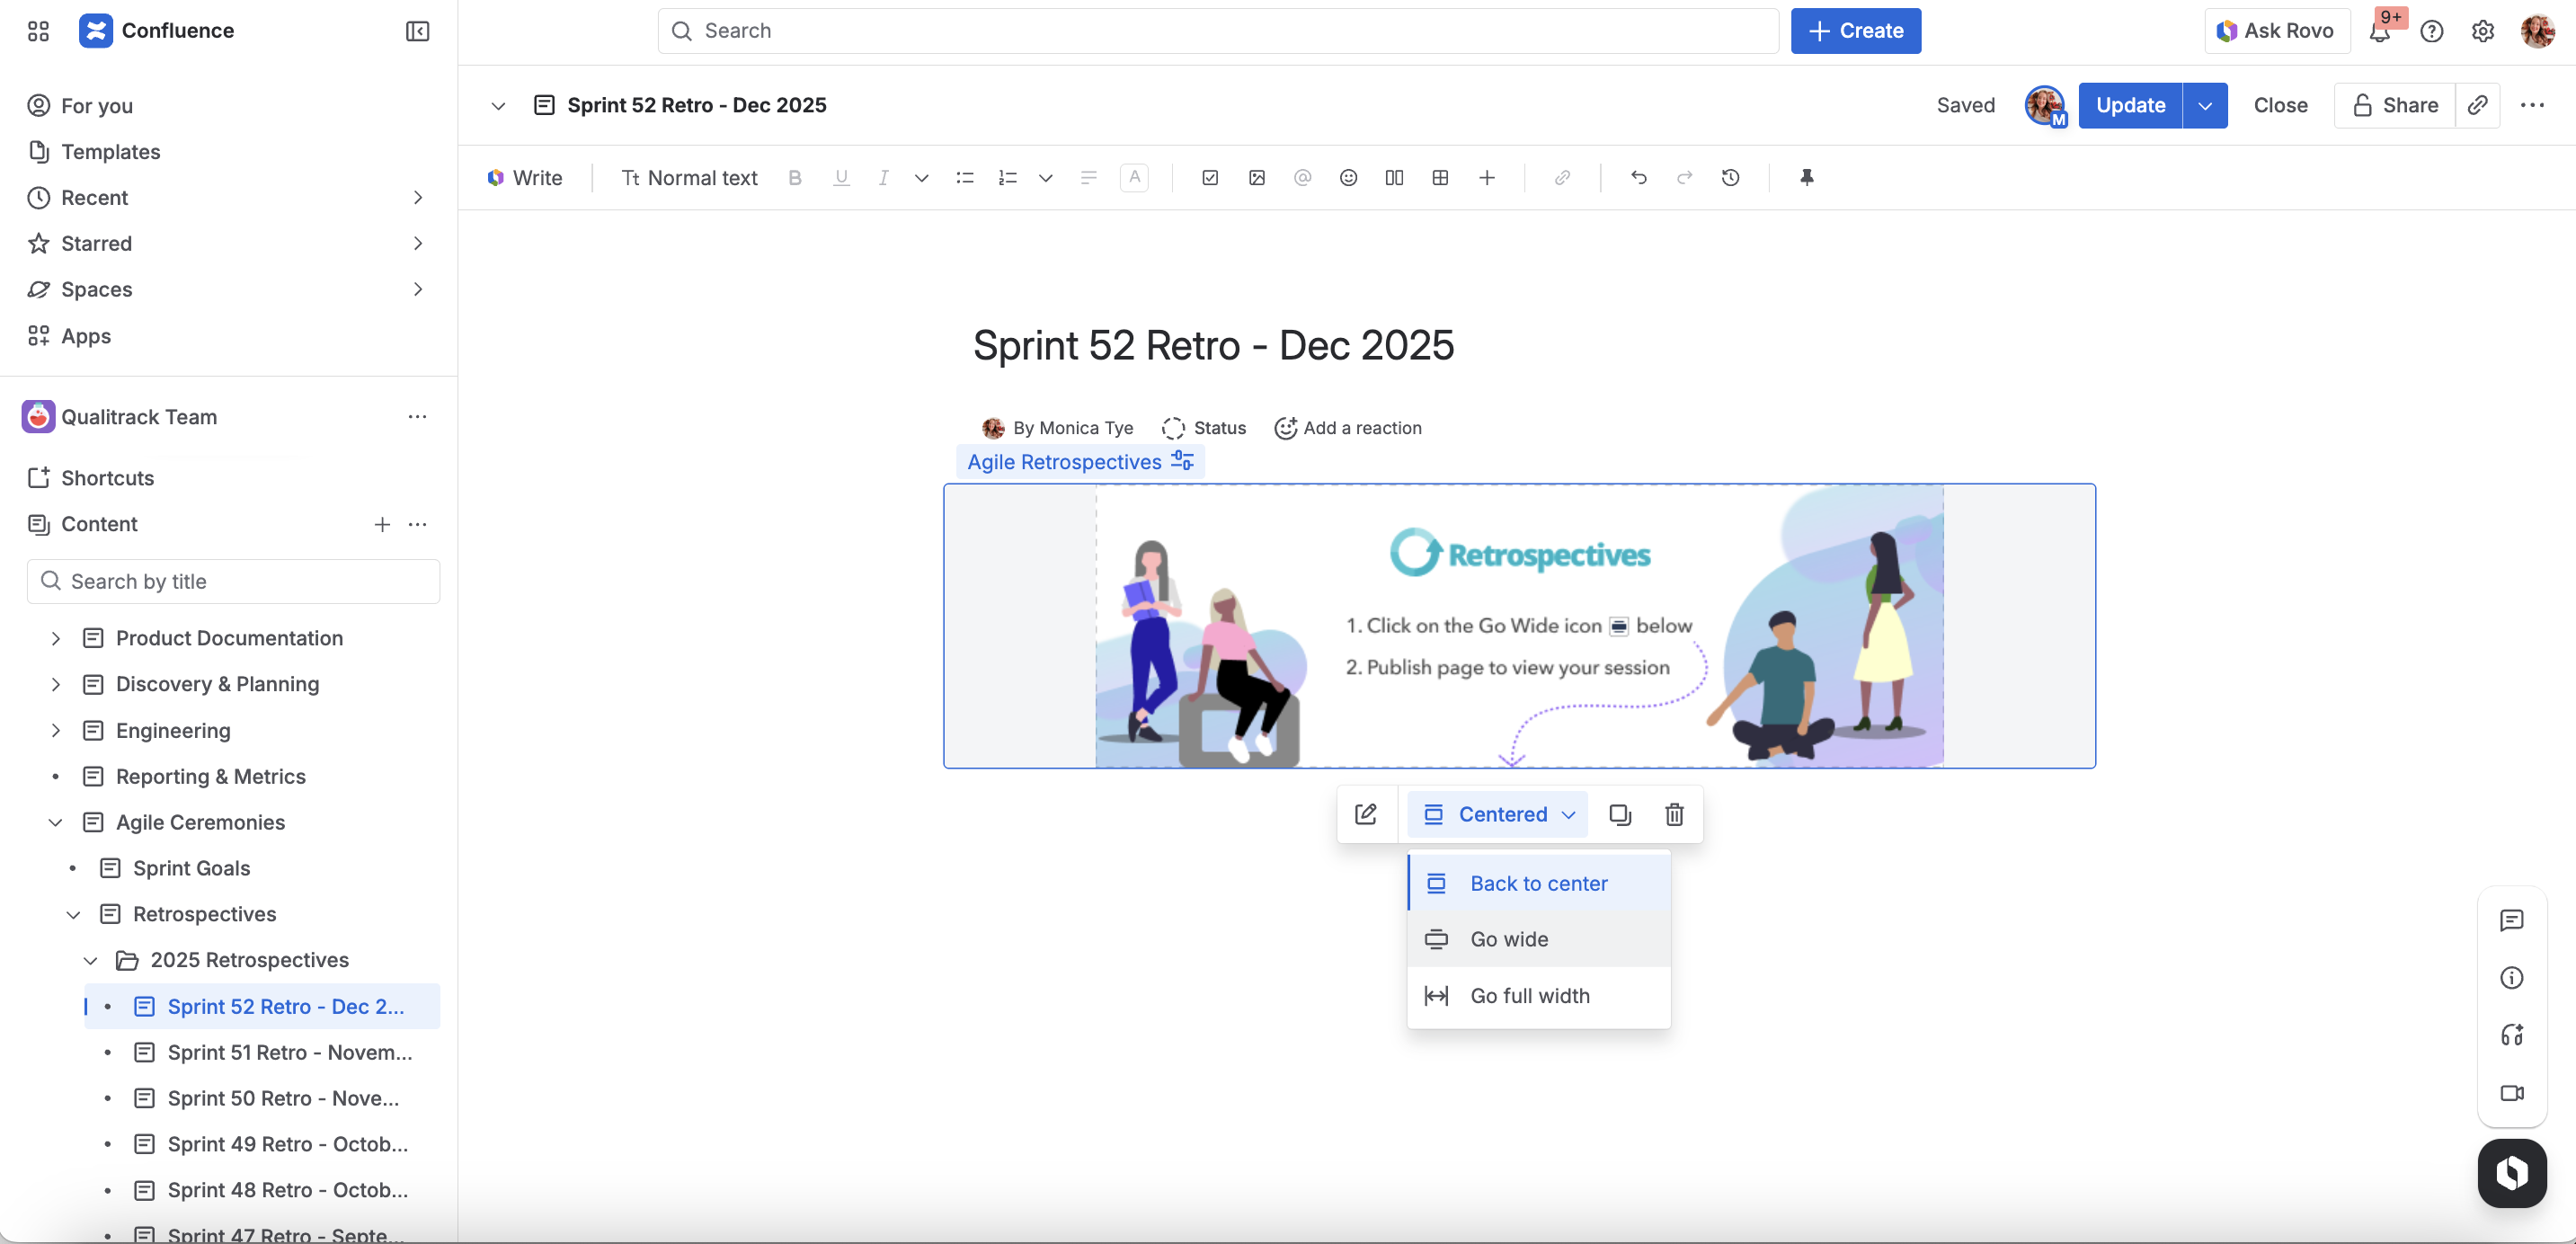
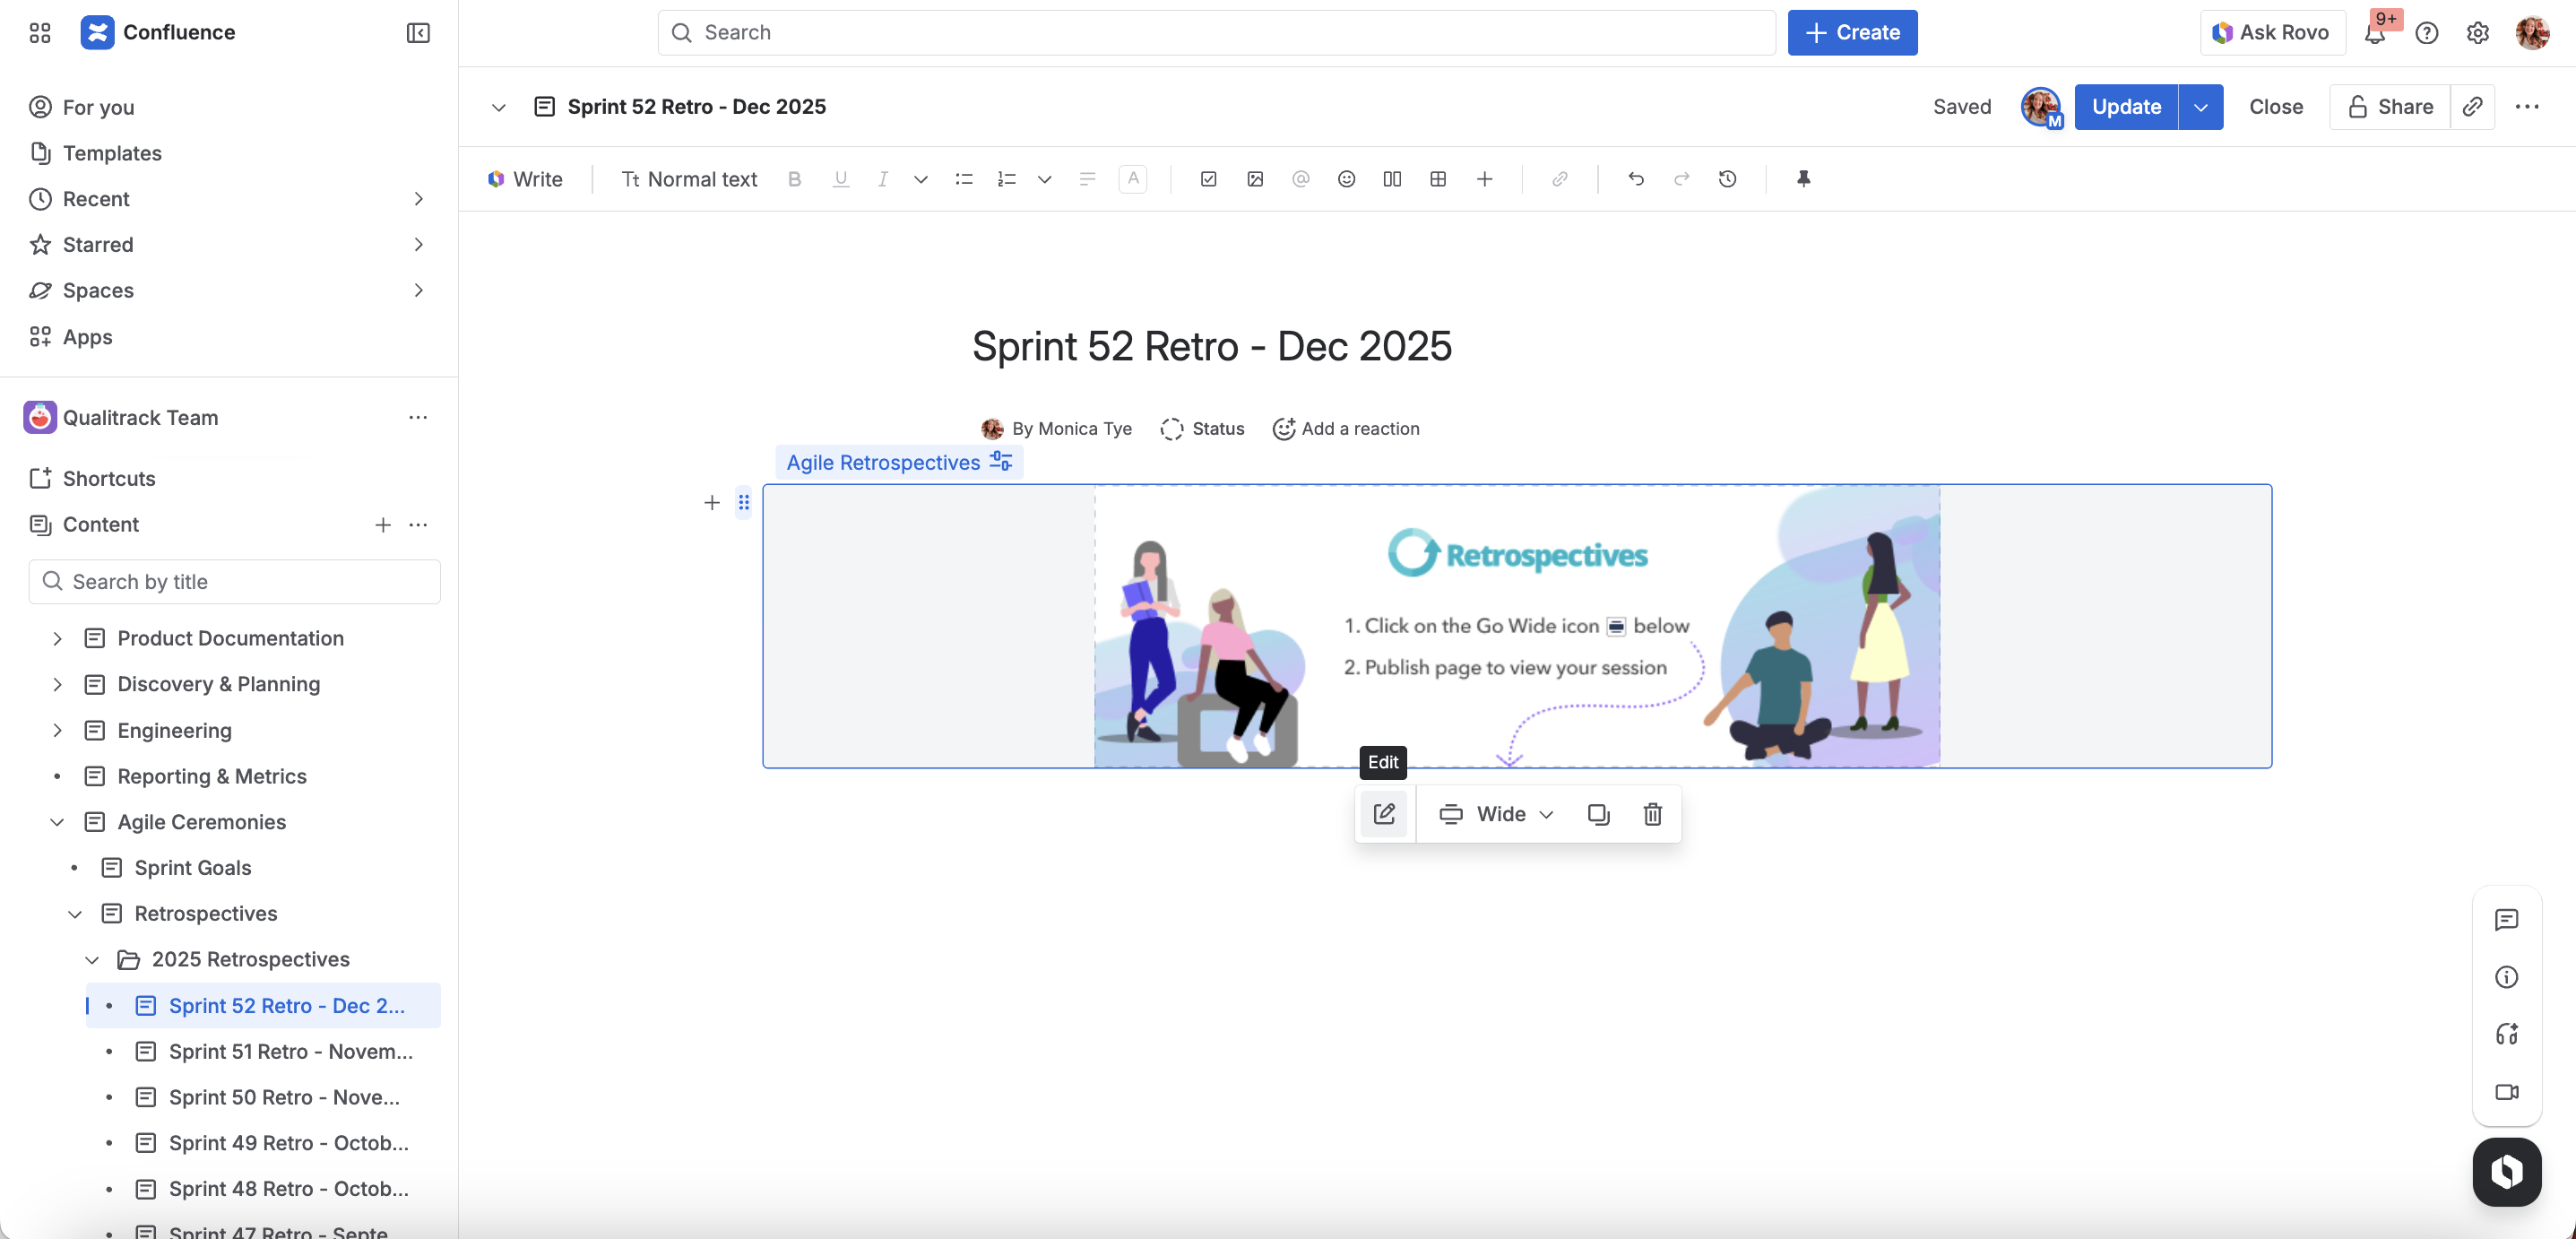
The macro will appear on the Confluence page.
-
Make sure to select the “Go wide” mode.
-
Click Publish at the top of the page to begin the retrospective session.
Editing a session’s settings
To edit the settings of a retrospective session simply follow these steps:
-
Go to the Confluence page where you are having the retrospective session and click on the pencil icon to edit it.
-
Locate the Agile Retrospectives macro, click on it, then click the pencil icon to edit it.
-
The Retrospective setup dialog will be displayed.
-
Make any the necessary changes to your session, then click on Save.
-
Publish the page to run your retrospective session.
Only sessions that have not been started can be edited.
Next Steps
Learn more about how to customize your retrospective’s setup to fit your team’s needs and run your first retrospective session.