
Customize your retrospectives' setup to fit your team’s needs and keep sessions engaging.
Fill out the following fields to personalize your retrospective session:
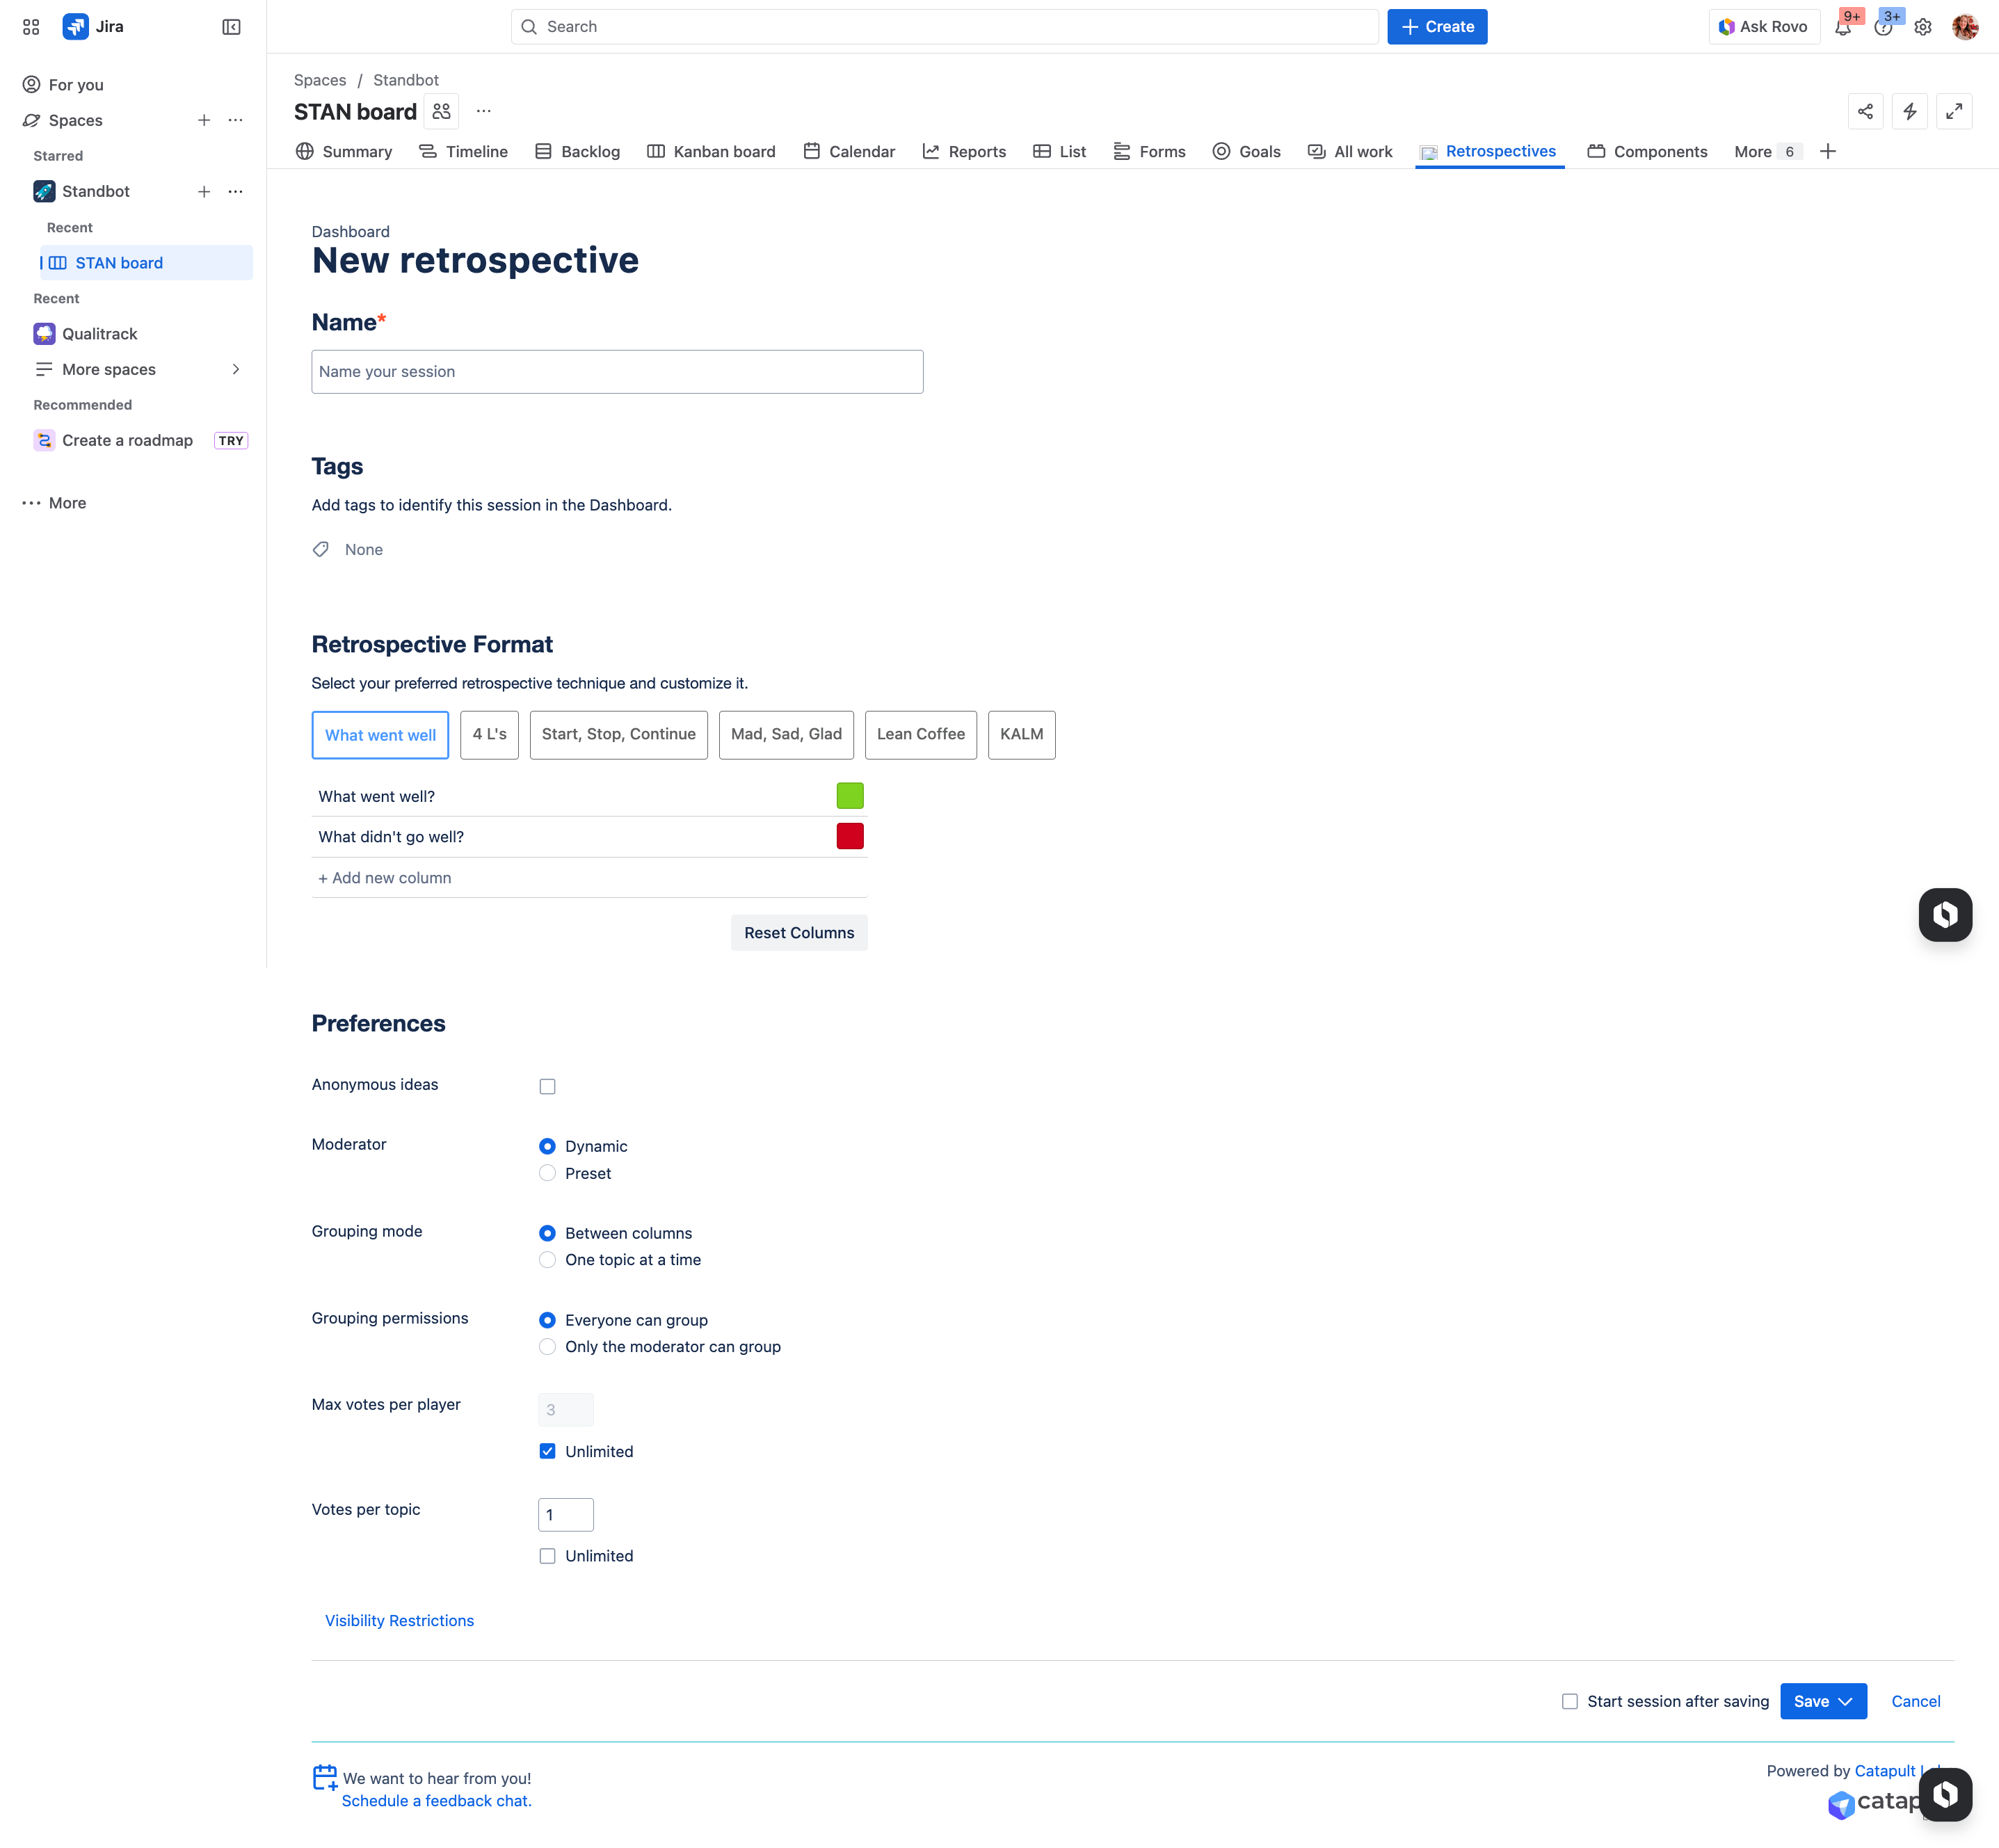
General information
-
Name: Provide a name to your retrospective session
-
Tags: Create or add tags to help you identify the session. Tags can be used to filter the sessions you want to see in your Dashboard.
Formats
Formats or retrospective techniques help you define the theme for your session.
We provide several format options to choose from, and you can make changes to any of them:
-
Add more columns
-
Edit or remove columns
-
Change the color of the columns
Preferences
-
Anonymous ideas
-
Moderator
-
Dynamic
-
Preset
-
-
Grouping mode
-
Between columns
-
One topic at a time
-
-
Grouping permissions: Select who can participate grouping ideas.
-
Votes per player: Define the total number of votes each participant will have.
-
Votes per topic: Define how many times a participant can vote for the same topic or group.
Visibility restrictions
By default all retrospectives created in the Jira Space or Project are public, since they can be joined by anyone with access to the Project/Space.
You can also choose to make retrospectives private by limiting who can participate in them and view their summary.
Making a retrospective private
Follow these steps to limit who can participate in a retrospective
-
Click on Visibility Restrictions
-
In the list, find Everyone and change it to “has no access”
-
Type the name of the participants or groups that should be able to participate in the session, select “has access”, and click Add.
-
Click Apply to save the changes.
-
Once you save the sessions' settings you will see a lock icon next to it, indicating that it is a private retrospective.
By default, certain roles are granted access to prevent retrospectives from becoming orphaned or inaccessible if the original creator leaves the project or organization.
-
Retrospective creator
-
Jira Project Lead
-
Preset Moderator (if applicable)
Saving the retrospective
Once you are happy with your retrospective’s setup, click Save.
-
Save session: Your setup is saved and the session is displayed in the Sessions in Progress section of the Dashboard.
-
Enable the checkmark Start session after saving to go directly to the retrospective instead of the Dashboard.
-
-
Save as Template: Lets you save the setup as a template so you can reuse it in future sessions. Learn more.
Next Steps
Now that you’ve created and configured your session, you are ready to run your retrospective.